Gas fireplace inserts solve a set of familiar problems for homeowners: drafty masonry fireplaces, uneven heat, high utility bills, and messy ash cleanup. The moment you retrofit a gas fireplace insert into an existing hearth, you trade open-flame ambience for predictable comfort and a fraction of the maintenance. The venting, though, is where the project is won or lost. Choose the right venting system and the insert will run quietly, heat efficiently, and pull moisture and combustion byproducts out of the living space. Cut corners, and you invite condensation, soot streaking, persistent odors, or nuisance shutdowns when wind gusts hit a vulnerable termination cap.
I’ve handled hundreds of insert upgrades, from tight row houses with 19th-century brick chimneys to new homes with no masonry at all. The technology keeps improving, yet the fundamentals stay the same: match the appliance to the structure, respect physics, and confirm everything with proper chimney inspections. Below, I break down how venting works, what your options are, and where each path shines or stumbles.
What “venting” really means with gas inserts
Every fuel-burning appliance has to bring in oxygen for combustion and discharge the leftovers. For gas fireplace inserts, the leftovers include water vapor, carbon dioxide, and traces of carbon monoxide, nitrogen dioxide, and unburned hydrocarbons. None of that belongs in living spaces. Venting is the controlled highway in and out, sized and routed for the specific burner and firebox.
A modern gas fireplace insert is essentially a sealed box engineered as a system: burner, heat exchanger, flame proving sensors, pressure switches, and a vent path tuned to a fixed resistance. In practice, even a few feet of extra pipe or a poorly executed elbow can change the pressure conditions enough to matter. That is why manufacturers supply venting tables with equivalent length limits and directional rules. If your fireplace installation ignores those tables, the unit may still fire, but you’ll likely see weak flame, glass fogging, or lockouts on windy days.
The three families of venting
Most gas fireplace inserts fall into one of three venting categories: direct vent, natural vent (sometimes called B-vent when used with a listed B-vent system), and vent-free. Each solves a different problem.
Direct vent inserts
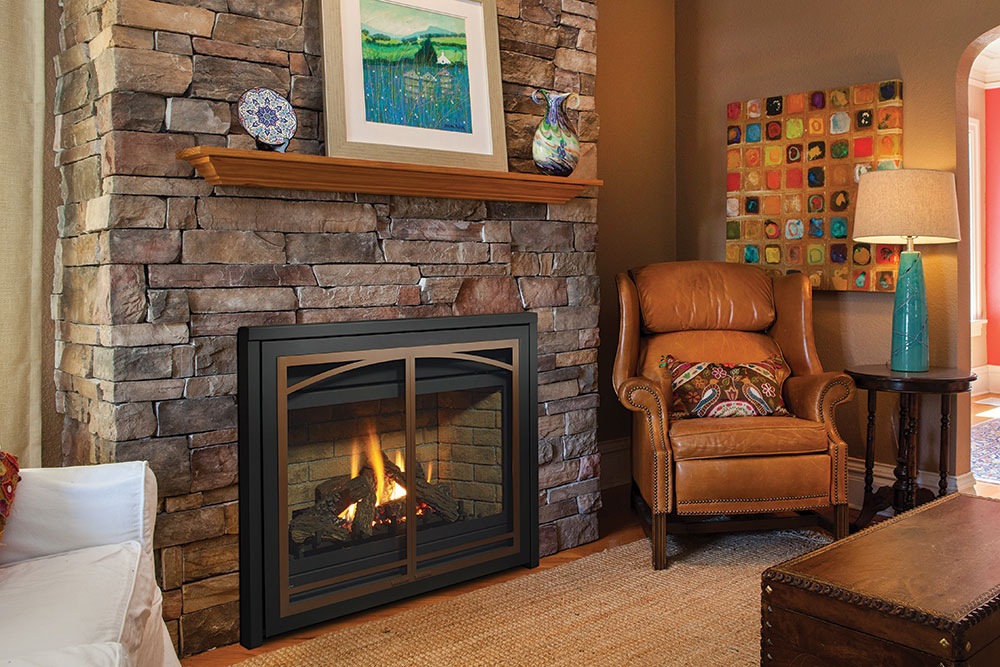
Direct vent is the workhorse for retrofits into existing masonry fireplaces. The insert uses two pipes: one brings in outdoor air for combustion, and the other expels exhaust. Often these two pipes run co-linearly up the old chimney to a termination cap at the top. Sometimes there’s a co-axial arrangement, where the intake surrounds the exhaust, which helps with thermal balance and draft stability. Because combustion air comes from outside, direct vent units do not depressurize the room, a real advantage in tight homes with bath fans and kitchen hoods that can fight for air.
In day-to-day operation, direct vent systems are dependable in varied weather. A properly sized vertical run will create predictable draft even in cold snaps when the chimney shell is frigid. When I retrofit into an older clay-lined flue, I run two flexible stainless steel liners, 3 to 4 inches in diameter depending on the appliance. These liners must be insulated or at least centered and supported to avoid rattles and hotspots. A purpose-built termination cap, tested with the insert, finishes the system. That cap is not decoration. The cap sets back pressure, keeps rain out, and discourages downdrafts.
Natural vent (B-vent) inserts
Natural vent inserts exhaust into a vent or chimney using buoyancy only. They pull combustion air from the room. B-vent is a listed double-wall metal system with a fixed air gap that helps the flue stay hot enough to maintain draft. In an existing masonry chimney, a B-vent liner is often installed to control sizing and provide a continuous, gas-tight flue to the top.
B-vent has fallen out of favor in tight houses because it consumes room air and relies on stable indoor pressure. Run a range hood and a clothes dryer at the same time, and you might overpower a small B-vent insert, causing spillage at startup. In older, leakier homes, and in mild climates, B-vent can still make sense, especially if the existing chimney path fits neatly within venting tables. The efficiency is usually lower than direct vent because you’re pulling conditioned air from the room and sending it outdoors.
Vent-free (unvented) gas units
Vent-free gas appliances discharge combustion products into the room. They use oxygen depletion sensors and strict firing limits to mitigate risk. Some jurisdictions ban them outright. Others allow them with restrictions on room volume, BTU input, and run time. I rarely recommend vent-free units for primary heat. Even when legal, the water vapor alone can cause condensation on windows and invite mold in corners. If a homeowner insists on vent-free due to structural constraints, I walk through the trade-offs line by line and often suggest an electric fireplace insert as an alternative if the goal is visual effect with minimal complexity.
How venting integrates with existing chimneys
A gas fireplace insert sliding into a masonry firebox needs a clear path to the roof. The old flue tiles are usually too large and rough to use directly. Oversize flues cool the exhaust, which can cause condensation and acidic deposits. The fix is a properly sized liner system connected to the insert and sealed at the top with a termination plate and cap.
Before any fireplace installation, schedule chimney inspections. A level 2 inspection, which includes a video scan, is warranted when you change the appliance type. I work with several trusted partners for this, and a good west inspection chimney sweep can spot cracked tiles, offsets, or hidden thimbles that would complicate the liner run. If we find a severe offset at, say, 15 feet up, we choose flexible liners and test-pull a length before we order the insert to confirm we can clear the elbow.
On historic brick chimneys, especially those with multiple flues sharing a stack, we pay attention to termination spacing. Exhaust from a water heater flue can drift across and down into an insert cap if clearances are tight and the wind carries the plume. Manufacturers usually publish minimums. When space is limited, we sometimes use a sidewall termination for the insert if the model allows, observing clearances to eaves, windows, and gas meters.
Vertical versus horizontal venting
Many direct vent inserts prefer a vertical termination through the existing chimney, but some models allow a rear discharge through the back of the fireplace and out a sidewall. Each path changes performance.
Vertical venting benefits from the chimney effect. Warm exhaust rises, which helps draft stability in marginal conditions. Vertical runs also place the termination beyond casual wind eddies. The drawback: taller runs add equivalent length. You have to stay within the manufacturer’s maximum, which can range from roughly 30 to 40 feet for many inserts. Elbows count more than straight pipe. A pair of 90s might equal 10 feet of straight run in the tables.
Horizontal venting, when permitted by the insert design and the building envelope, simplifies access for service and can speed installation. You must respect clearances to grade, soffits, and openings. Wind off corners can push into a sidewall cap. If I see a site where winter winds hit one side of the house, I favor the leeward wall or bump the termination location a few feet to avoid a vent landing behind a shrub where snow packs. Small placement changes pay off in fewer nuisance shutdowns later.
Sizing and materials that make or break the job
Gas fireplace inserts usually call for 3 or 4 inch liners in a co-linear setup. Stainless steel is the standard for durability, with different alloys depending on whether the fuel is natural gas or propane and whether condensation is likely. The intake liner does not see flue gases, but it still needs to be listed for the application and supported. Cheap aluminum duct is not an option here.
For B-vent, use listed double-wall pipe with locking seams and firestops where it passes through floors or chases. Transitioning from B-vent to single-wall or vice versa inside the chimney void is rarely allowed. Stay with one listed system from the insert collar to the termination. Termination caps matter: a generic B-vent cap on a direct vent system will not work, and vice versa.
Equivalent length calculations sound tedious, but they’re essential. On a recent project, the spec allowed 35 feet maximum with two 90s. The flue was 28 feet to the crown, plus 5 feet of horizontal jog and two elbows to clear a lintel. We were at the edge. We swapped one 90 for two 45s, which cut the equivalent length and improved flow. That small change gave the pressure switch enough margin to prevent lockouts when the homeowner runs a 600 CFM range hood.
Combustion air and house pressure
Direct vent inserts bring air from outside, which isolates them from house pressure. Natural vent inserts use room air. Where it gets interesting is mixed systems. You might have a very tight home with energy upgrades, bath fans, and a powerful kitchen hood. Even a direct vent unit can struggle if the intake is undersized or the cap sits where wind creates a low pressure zone.
If you notice a lazy flame that steadies when fans are off, think pressure. Check that the intake liner is uncrimped and the cap screen isn’t clogged with lint or spider webs. In a wind-prone area, a high-wind or rotating cap specified by the manufacturer can help. I never use aftermarket caps that are not listed with the insert. It voids warranties and changes backpressure unpredictably.
Condensation, corrosion, and cold chimneys
Gas burns cleaner than wood, but the exhaust contains significant water vapor. Low flue temperatures add to the risk of condensation, which then carries acidic compounds to the liner and cap. In oversize masonry chimneys, you’ll sometimes see moisture streaks below a metal termination plate in winter. The fix is to right-size the liner and, in cold climates, insulate it. Insulation maintains flue gas temperature enough to keep moisture in vapor form until it exits the cap.
Glass fogging on startup is normal for many inserts, especially after a long off cycle. Persistent streaking that does not burn off suggests negative pressure or a vent restriction. I’ve also seen corrosion on cheap fasteners used at the cap. Stick to stainless hardware and gaskets intended for flue gas exposure.
Safety devices and what they’re telling you
Modern gas fireplace inserts monitor themselves. Pressure switches confirm vent movement. Flame rectification confirms ignition stability. Spill switches and temperature limits ride herd on abnormal conditions. If the unit trips periodically, read that as a symptom rather than an annoyance to bypass.
A few telltales from the field:
- Frequent pressure switch faults on windy days often tie back to the termination cap style or location. Moving the cap or switching to a listed high-wind cap can solve it. A unit that lights and then shuts down after 30 seconds may be starved for combustion air. Check the intake run and verify the co-linear adapters are seated and sealed. Glass hazing that returns quickly after cleaning can point to a vent leak inside the chase, drawing room air into the exhaust path and cooling it. Smoke testing around joints helps.
Working with existing hearths and surrounds
Every retrofit starts with measuring the firebox opening, depth, and the height to the damper area. Many older fireplaces have a cast iron damper that constricts the throat. We often remove the damper plate and sometimes the frame to make space for liners. The liner run might need an ovalized section to clear tight throats. This is normal, but it must be done with listed components or approved field modifications.
The surround panels that finish the opening are not just for looks. They close the gap between the insert and the old masonry, reducing drafts and making the convection path efficient. Behind those panels, we seal the smoke chamber with a block-off plate and insulation. That plate improves performance by keeping heat in the living space rather than letting it climb into the chimney void.
Where electric fireplace inserts fit
Some homeowners reach the venting stage and realize their chimney is compromised, the roof termination is too close to a dormer, or they live in a condo with restrictions. In these cases, an electric fireplace insert gives visual comfort without combustion. Electric fireplace inserts have improved dramatically. The flame effects are convincing, some models provide 4,000 to 5,000 BTU of resistive heat, and installation is straightforward: a dedicated circuit, proper clearances, and you’re done. For clients who mainly want ambience and zone heat in shoulder seasons, the electric option avoids venting complexity while preserving the look.
Maintenance that actually prevents problems
Gas is tidy, but it’s not maintenance free. Annual service keeps the vent path safe and the unit efficient. I schedule a thorough check each fall so we can catch issues before the first cold snap.
A solid visit includes cleaning the glass and checking the gasket, vacuuming the burner and media, verifying the vent connections inside the firebox, and confirming the termination cap is intact. For rooftop terminations, pair the service with a chimney cleaning service if the stack also supports a woodstove or furnace with a separate flue. While gas liners stay cleaner than https://www.safehomefireplace.ca/fireplaces/gas/gas-fireplaces/ wood, nests, leaves, or construction debris can block a cap. Regular chimney inspections are inexpensive insurance.
If your property is older or you’ve made air-sealing upgrades, ask for a draft test with typical household fans running. It takes minutes and can reveal pressure problems that only appear when the house is closed up for winter. A seasoned west inspection chimney sweep or HVAC tech will have the tools and habits for this kind of check.
Cost factors and timelines
For a typical direct vent gas fireplace insert retrofit into a sound masonry hearth, expect a project range that covers the insert itself, two stainless liners with a co-linear cap, electrical for the blower and controls, and labor. Prices shift by region and brand, but in many markets you’ll see a spread from the mid four figures to the low five figures, depending on aesthetics, BTU size, and how challenging the liner path is. If the chimney needs masonry repairs, that’s a separate line item.
Time on site often runs a day for straightforward jobs and two days if we encounter offsets, damper removal, or chase reconstruction. Permitting varies. Some jurisdictions require a mechanical permit and a pressure test for gas piping. If we are switching fuels from wood to gas, a level 2 chimney inspection is usually mandated.
Choosing between direct vent, B-vent, and vent-free
When clients ask which is “best,” I ask about goals, home airtightness, and the existing chimney. If you want reliable heat and sealed combustion, direct vent is the clear favorite. If you’re working in an older, drafty home where the chimney height is generous and you want a budget-friendly approach, a B-vent insert can be adequate, though less efficient. If the space cannot support any vent path and local codes allow it, a vent-free unit might be a last resort. Most of the time, when venting is truly impossible or would look awkward on an exterior facade, an electric fireplace insert solves the aesthetic goal with zero combustion risk.
Practical decision steps
Here is a concise path I use on assessment visits:
- Verify chimney condition with a camera inspection and measure all critical dimensions, including throat restrictions and total height. Match a gas fireplace insert to the space heating goal, sizing by room volume and insulation level rather than just the largest BTU on the brochure. Select the venting approach, then design the run on paper with elbows, offsets, and a termination that suits the site’s wind patterns. Confirm gas supply and electrical, including circuit load for blowers or accent lighting. Schedule installation with a weather window for safe roof work and plan a post-install combustion safety test.
Frequent pitfalls to avoid
A few recurring mistakes drain budgets and patience:
- Using oversized existing flues without liners. This invites condensation, cold starts, and weak draft. Mixing vent components across brands or types. The system is only as good as its weakest, unlisted link. Skipping the block-off plate above the insert. Heat then migrates into the chimney void, reducing efficiency and sometimes triggering safety limits. Terminating too close to a roof plane or wall corner where wind rams directly into the cap. A few feet of relocation cures a lot of ghost problems. Treating a vent-free unit as primary heat in a sealed home. The moisture and byproducts create indoor air quality headaches.
When to bring in specialists
If your chimney shows signs of prior creosote fires, cracked crowns, or shifting masonry, pause the insert plan until a masonry pro or certified sweep repairs the structure. If your house has a large makeup air demand from a commercial-style range hood, loop in the HVAC contractor. A coordinated plan that includes makeup air will prevent the insert from fighting the kitchen equipment. When noise is a concern in a media room, talk to the installer about flexible liner supports and cap choices that reduce harmonic chatter on gusty nights.
A reputable installer will stand behind the system, not just the box. That includes leaving you with a tidy binder: venting tables, gas valve model, cap part numbers, combustion test results, and warranty forms. Keep that packet. When you need service in five years, it saves time and guesswork.
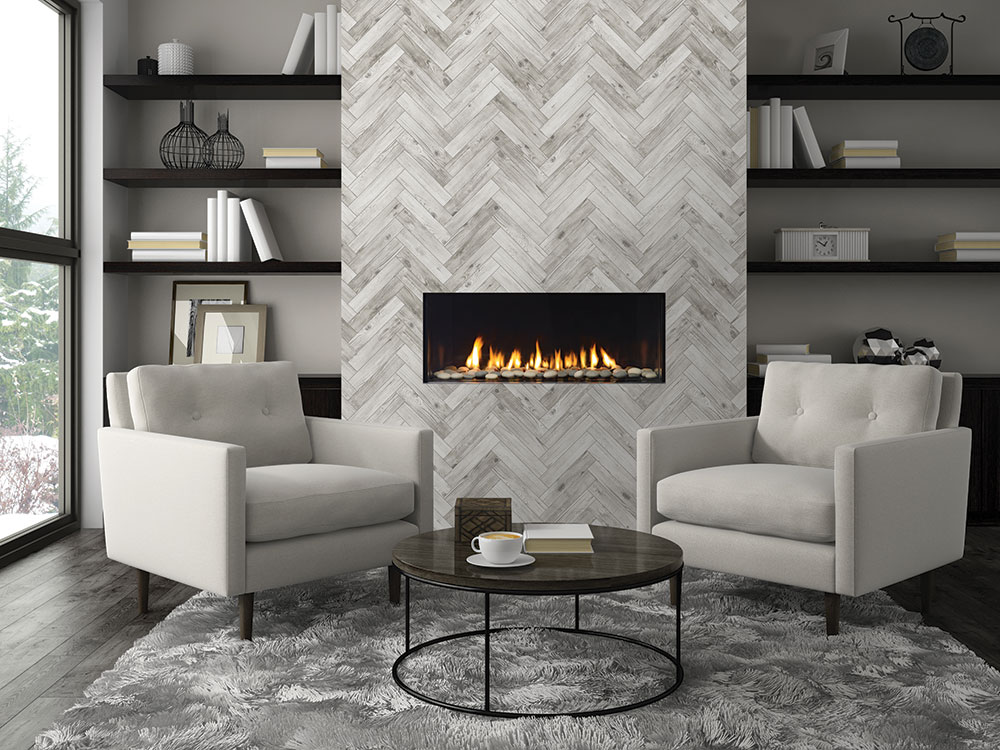
A quick note on aesthetics and heat distribution
People choose gas fireplaces for reasons beyond physics. Flame quality matters. Some direct vent inserts do a superb job with ember beds and varied flame heights while still maintaining sealed combustion. Ask to see live units running, not just photos. For heat distribution, a quiet blower with variable speed does more good than a high CFM screamer. On open floor plans, small changes in airflow make a big difference. I’ve measured 3 to 5 degree improvements across a room after adjusting baffles and blower speeds on a well-installed insert.
If your home has existing ductwork nearby, resist the temptation to tie the insert into the central system unless the manufacturer specifically allows ducting. Most do not. Inserts are listed as space heaters with local circulation, not whole-house furnaces. Respect those limits and you avoid liability and comfort problems.
Final thoughts from the field
A gas fireplace insert can transform a stubborn, drafty hearth into a reliable heat source with a clean viewing window. The venting you choose determines how effortlessly it performs year after year. Direct vent solutions dominate for good reasons: sealed combustion, predictable draft, and high efficiency. B-vent still has a niche in certain homes, provided you handle the room air and sizing with care. Vent-free demands a cautious eye and, where possible, deserves a second look at alternatives like electric fireplace inserts.
Before you order the appliance, invest in a thorough assessment. Bring in a qualified installer and schedule chimney inspections with a trusted sweep. Make the venting plan explicit, from the insert collar to the termination cap. Use listed parts, mind the equivalent lengths, and place the cap where wind helps rather than hurts. That diligence turns a pretty flame into a dependable, safe, and efficient addition to the home.
For homeowners already comparing models, pay attention to the venting tables and cap options in the manuals as much as the flame photos in the brochure. The best-looking gas fireplaces still need a clean, smart path to breathe. With the right plan, your fireplace insert will start every time, stay quiet in a gale, and give you the kind of heat that makes winter evenings a pleasure.